Table Of Content
There is nothing wrong with sending small items using standard shipping services. But if you want to save some money on returns and damages, a bubble mailer is perfect for the job! Well, it's significantly cheaper than using a shipping service and still provides better protection than simply wrapping up the parcel in a regular envelope.
Whether you are sending jewelry, phone accessories, or small books, with a bubble mailer, your item will travel safely. Due to their lightweight design and padding, bubble mailers are among the most widely used mailing options.
This article will help you learn how to address a bubble mailer, how to ship a bubble mailer with USPS or other carriers, how much it costs, and other essential details regarding the process.
What Is a Bubble Mailer?
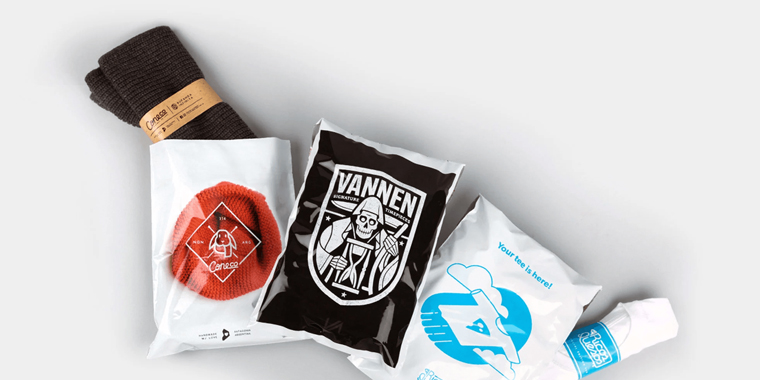
Bubble mailer is a specific type of padded envelope featuring bubble wrap inside in order to protect shipped items from damage caused by external forces such as bumps, falls, pressure, UV rays, moisture, etc.
While a standard envelope has no protective features at all, and a box is rather expensive plus impractical, a bubble mailer stands in the middle ground. The best part is that it secures versatile, lightweight, and somewhat delicate goods in transportation without any hassle.
Types of Bubble Mailers:
Poly Bubble Mailers:
Such mailers have a plastic outer cover that makes them resistant to moisture, and are ideal for shipping jewelry, electronic devices, collectibles, and fragile items.
Kraft Paper Bubble Mailers:
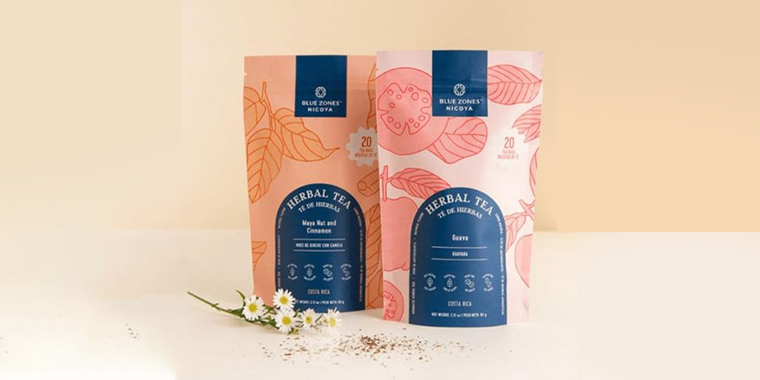
These envelopes have a brown outer cover and are more environmentally friendly. Moreover, they look very professional compared to other mailers. Best for sustainable brands and artisan products!
Self-Sealing And Peel-and-Stick Mailers:
They also close the same way, but there is one significant difference between them: in peel-and-stick mailers, there is an adhesive strip hidden under a paper backing.
Steps for Mailing a Bubble Mailer
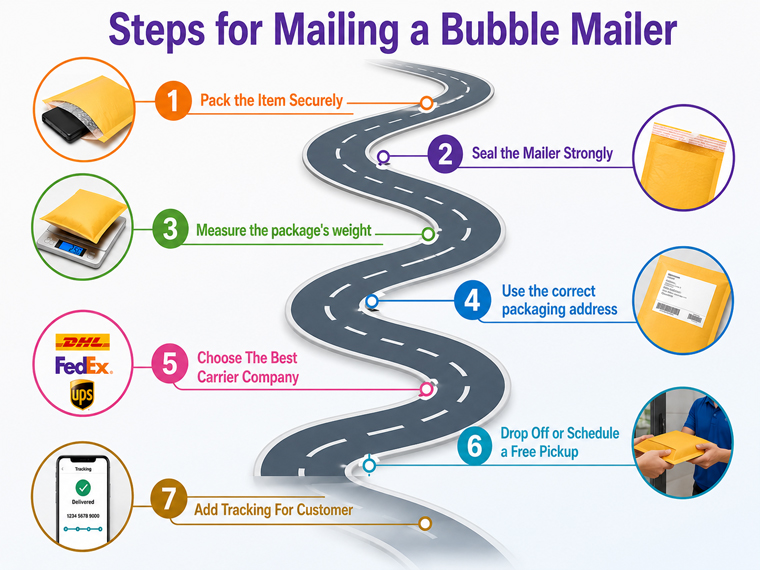
Here's a step-by-step guide on how to mail a bubble mailer, and it's all laid out here in one simple, easy-to-follow format.
Read More: How to Ship Glass Items Without Risking Damage in 2026
Step 1: Pack the Item Securely:
Pack the item securely inside the mailer, and when you are doing so, ensure that it fits and allows little to no movement. If your item is fragile, pack it separately in bubble wrap or tissue paper before placing it in the mailer. A little extra cushion will go a long way if you are shipping fragile items like electronics and glass.
Step 2: Seal the Mailer Strongly:
Check all edges of sealing tape and reinforce where needed. Make sure to close the flap by running your fingers along the entire adhesive surface to ensure its seal is secure. Also, check corners, as they are typically the weakest places in terms of holding power for a bubble-type mailing envelope. Just like shipping boxes!
If you are mailing heavier or more valuable items, it is recommended that you add a piece of clear packing tape across the sealed area so that it does not come apart during shipping.
Step 3: Measure the package's weight accurately:
Postage is based on weight, so you want to know the exact weight of your bubble mailer package in order not to overpay or underpay for shipping.
The easiest way to do this is by using a postal scale to weigh your bubble mailer package. If you do not have a postal scale, you can take your bubble mailer package to your local post office, and they will weigh it for free. The weight of your package will also help you avoid overbuying or underbuying postage.
Step 4: Use the correct packaging address:
Correct package addressing is a necessity! This is where most people have problems. Properly addressing your bubble mailer is done this way;
- Return Address: Top Left Side of Mailer (Your Name/Street/City/State/ZIP)
- Addressed to Recipient: In The Middle of The Mailer (Clearly Written or Printed)
- Postage: Top Right Side of Mailer
When addressing your mailer, use a Permanent Marker or print a label on it; do not use a ballpoint pen on poly mailers, as this may cause the ink to smear. Follow these instructions on how to properly address a bubble mailer, and you will be able to successfully mail your package each time.
Tip: Use black or dark blue ink, write in block letters with no decorative fonts, and leave adequate spacing between address lines.
Step 5: Choose The Best Carrier Company:
Use the best carrier for your needs regarding delivery speed, size, and cost. USPS is the best option for shipping small bubble mailers due to its affordability.
As an example of how affordable USPS is, using 2025 pricing from their rates, you’ll find that First Class Package Service starts at approximately four dollars ($4) for packages weighing less than one ounce.
Step 6: Drop Off or Schedule a Free Pickup:
For a lot of small business owners, or those who may have regular shipping needs, setting up a pickup service is an absolute game-changer to be able to send your products out without going to the Post Office, which can eliminate wasted hours of your time.
Step 7: Add Tracking For Customer Satisfaction:
Tracking is a benefit for you and the person receiving your shipment. Here, you will automatically have tracking attached to your USPS First-Class Package. If you use any other method of shipment, make sure to add tracking during checkout or at the time of purchase. Always keep a copy of your tracking number and shipping tags until the delivery is confirmed.
How to Label a Bubble Mailer
If you're wondering how to label a bubble mailer, there are several options available.
Using Shipping Labels:
Shipping labels can be printed at home or purchased through USPS. Lastly, you can generate labels through online shipping platforms
Special Handling Labels:
Depending on the contents, you may add:
- Fragile labels
- Do Not Bend labels
- Tracking barcodes
- Return service labels
Ensure labels do not cover each other or interfere with barcode scanning.
How to Write on a Bubble Mailer
Because the padded surface of a bubble mailer can occasionally be uneven, on one. For optimal outcomes:
- Make use of a permanent marker.
- On a level area, write.
- Don't write over textured or seam regions.
- Before handling, let the ink totally dry.
- Use a self-adhesive shipping label if writing on the surface is challenging.
USPS Shipping Services for Bubble Mailers
Details on each sort of shipping options and services.
| USPS Service | Best For | Key Benefits |
| USPS Ground Advantage | Small merchandise, lightweight products, e-commerce shipments | Affordable rates, USPS tracking included, reliable delivery for everyday shipping |
| Priority Mail | Faster deliveries, higher-value items, packages requiring insurance | Expedited shipping, tracking included, insurance coverage available |
| Priority Mail Flat Rate | Heavier items are shipped in USPS-approved Flat Rate mailers | Predictable pricing regardless of weight (up to USPS limits), cost-effective for heavier shipments |
Read More: Learn What Kind of Packaging is Best for Mailing Clothing
Conclusion
Sending a bubble mailer is as easy as it sounds. You need to take the item you're shipping and pack it snugly, seal it well, and confirm its weight and address. Then you will have to calculate the postage amount and pick a shipping carrier before dropping it off.
Make sure to use the right-sized bubble mailer, and properly seal the item in order to maintain the integrity of the item during shipment, especially if it is a fragile item or of high value.
Would you like to order custom bubble mailers or other packaging that represents your business? Call Custom Design Boxes today at 888-385-1812 for all of your product and brand marketing needs.
Frequently Asked Questions
We’re confident that you will love our products and service.

Abdul Waheed
With over a decade of experience in the printing and packaging industry, I’ve dedicated my career to helping brands reshape their identity with creative, sustainable, and cost-effective packaging solutions. Being the CEO of Custom Designs Boxes, my mission is simple: to balance innovation with affordability so businesses of every scale can enjoy premium packaging truly reflecting their vision. When I’m not strategizing for the next big packaging trend, you’ll find me exploring design inspirations, mentoring my team, and building lasting relationships with clients.