Table Of Content
The art of paper folding isn't just fun. It's a creative activity. Children and adults both enjoy it. Whether you are a parent or a beginner, learning how to make an origami box with lid is the right solution. Honestly! You can create a simple storage box or a gift box in no time.
This guide will teach you how to create a perfect origami box with a lid using basic folds. You will find creative ideas, instructions, and tips. With just a square piece of paper and a bit of practice, you’ll be able to craft a neat box for gifting and decor in no time. No glue or scissors needed. Let’s get folding!
What You’ll Need to Make Your Origami Box with Lid?
Gather all supplies you need for this simple yet impressive origami project.
Paper:
6" x 6" square origami paper (double-sided looks best)
For the base: A slightly smaller square (if desired for a snug fit)
For the lid: A square that's about 1/4" larger than the base paper
Surface:
Flat and clean table
Optional:
A ruler for crisp folds. A pencil for marking.
Tip: Use thicker paper or patterned paper for gift-ready designs.
You can choose paper in any color or pattern to customize your box. The size and shape of your paper can affect the box's final dimensions. Try to experiment with different paper sizes.
How to Make the Origami Box Lid for Kids?
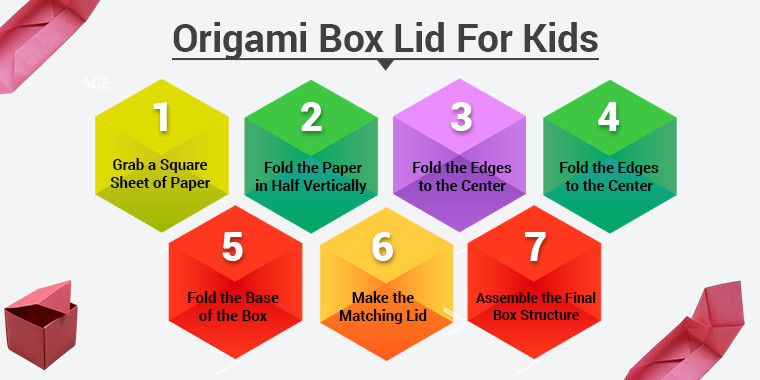
Follow these 7 easy steps and instructions to craft your origami box.
Step 1: Grab a Square Sheet of Paper
Get a square of paper. Put it on the table. Place its colored side outside, facing down. A 6" x 6" paper is good for creating a smaller box. Use an 8" x 8" square sheet of paper if you want to make a bigger box.
Step 2: Fold the Paper in Half (Vertically & Horizontally)
Fold the paper in half horizontally. Bring the top edge to the bottom edge. Crease well and then unfold. Fold the paper in half vertically. Bring the left edge to the right edge. Crease well and then unfold. You should now have a ‘+’ crease in the center.
Step 3: Fold the Corners Toward the Center
Take each corner and fold it into the center point one by one. All the creases connect at this point. This will create a smaller square in the middle and shape the sides of the box. It will also define where the sides of the box will be.
Step 4: Fold the Edges to the Center
Fold the top edge down to the center crease. Crease sharply and then unfold. Now fold the bottom edge up to the center crease. Crease sharply and then unfold. These creases will help form the box walls in the next step.
In the next step, you’ll use these creases to lift the sides and shape the box.
Step 5: Fold the Base of the Box
Follow Steps 1–4 above to complete the base. Set it aside.
Step 6: Make the Matching Lid (Using Larger Paper)
Take a square of paper about ¼" bigger than the base. Repeat Steps 1–5 to create the lid. Ensure the folds are closer so the lid can easily fit over the box.
Note: The origami box lid should cover the base snugly without being too tight.
Step 7: Assemble the Final Box Structure
Fit the lid over the base carefully once both pieces are folded. Press down lightly until it fits snugly. You have created your own origami box with a lid. It's ready.
Easy Origami Box Ideas: Beyond the Basics
Try these creative box ideas once you have mastered the classic fold.
| Ideas | Best Uses |
| Mini Treasure Boxes | For kids’ party favors |
| Wedding Favors | With rice, seeds, or confetti |
| Memory Boxes | Hold photos, notes, or trinkets |
| Plant Pot Cover | Fit a small succulent inside |
| Candle Holder | Use thick paper and place an LED tea light inside |
| Puzzle Box | Hide a note inside for games |
Origami Box Creative Variations
Now, let’s dive into some exciting variations that will let you get creative with your origami skills. These ideas are perfect for adding a unique twist to your box and making it truly your own!
-
Origami Box with Lid One Piece
Challenge yourself by creating an origami box where only the lid is attached. All from a single sheet of paper. This requires a bit more precision, but it’s a fun way to test your skills and create a sleek and one-piece design.
-
Origami Box with Lid Rectangular
Looking to add a twist to your origami skills? Try folding a rectangular piece of paper instead of a square. This will create a longer and more unique-shaped box that offers extra space for storing more items. This makes it ideal for both practical and creative.
-
Origami Gift Box with Lid
Dress up your box by adding twine around it or a cute sticker to give it a personal touch. You can also tuck a personalized note inside the lid for an extra thoughtful detail. These small additions will make your gift feel even more special and memorable.
-
Origami Box Easy
Short on time or just starting out? Keep it simple by skipping the more intricate steps and sticking to the basic version of the origami box. This version is quick to fold and still looks great.
4 Pro Tips for the Perfect Origami Gift Box
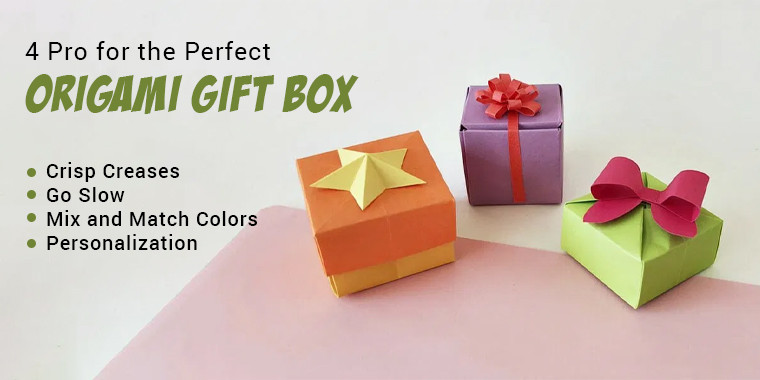
Ready to add some flair? With these expert tips, you’ll be able to turn your box into something extraordinary.
-
Crisp Creases
Sharp and well-defined creases make folding easier. It will give your final box a more structured shape.
-
Go Slow
Slow and steady correctly wins the day. It’s more important to do it right than to hurry.
-
Mix and Match Colors
Use contrasting colors for the base and lid. It will create a stunning origami gift box.
-
Personalization
Done with finishing your box? Now jazz it up with your favorite decorations. Add a personal touch by decorating your box with stickers or drawings.
Conclusion
You've just learned how to make an origami box with lid from start to finish. It’s a worthwhile craft that results in a practical and beautiful object.
These boxes make incredible gifts on their own or as packaging for another small present. You know the basics now. Just experiment with different papers and sizes to create a new origami box.
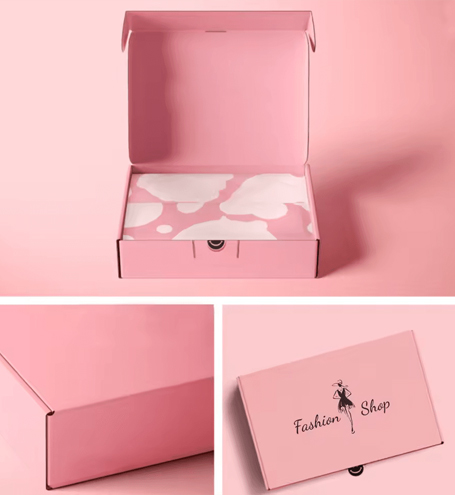
Want to take your packaging to the next level? Custom Designs Boxes is here to make it happen and offers customizable options for your brand. Email us at sales@customdesignsboxes.com or call us at 888-385-1812.Frequently Asked Questions
We’re confident that you will love our products and service.

Abdul Waheed
With over a decade of experience in the printing and packaging industry, I’ve dedicated my career to helping brands reshape their identity with creative, sustainable, and cost-effective packaging solutions. Being the CEO of Custom Designs Boxes, my mission is simple: to balance innovation with affordability so businesses of every scale can enjoy premium packaging truly reflecting their vision. When I’m not strategizing for the next big packaging trend, you’ll find me exploring design inspirations, mentoring my team, and building lasting relationships with clients.